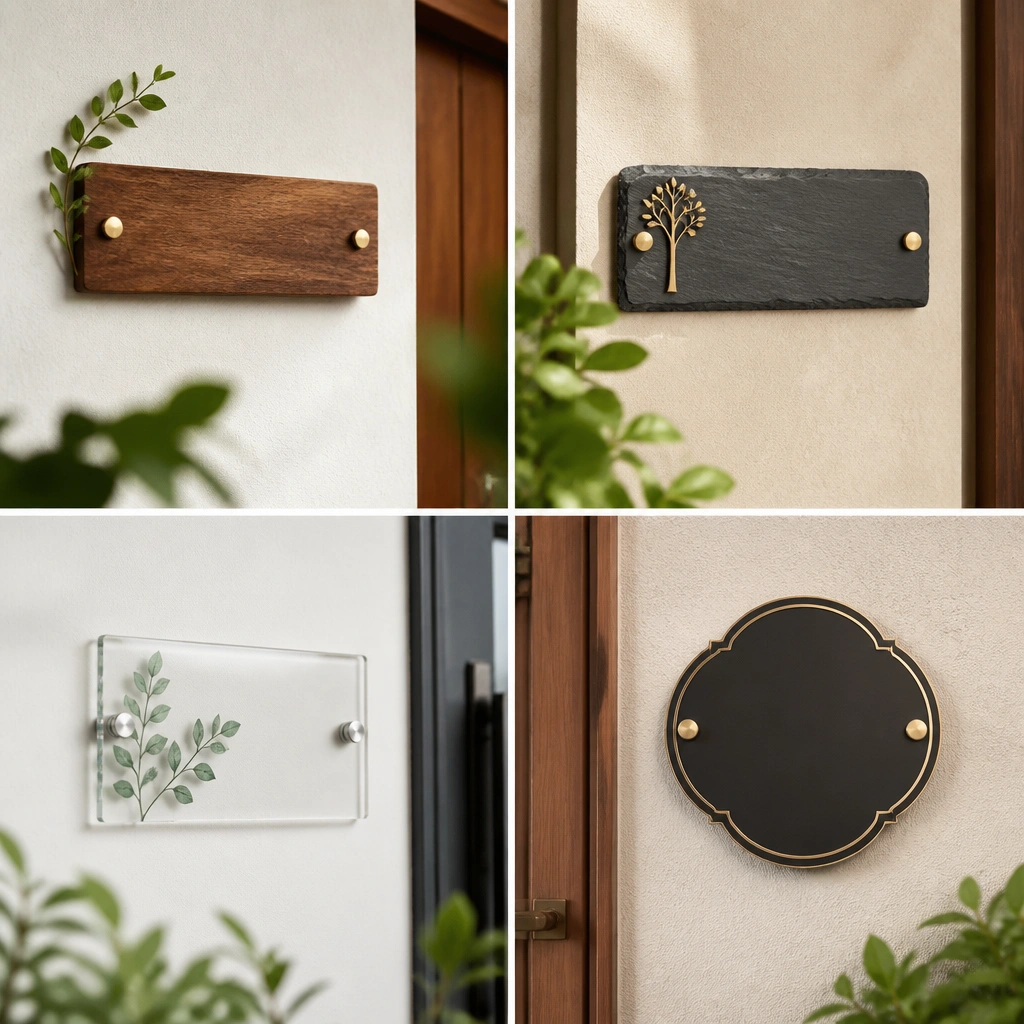
1. Slim brushed brass doorframe plaque
A slim brushed brass doorframe plaque is one of the best “small space” moves because it takes advantage of existing vertical real estate. Mount it next to the hinge side or pull side so it’s visible when you turn toward the door, not when you’re already facing the wall. The thin metal edge keeps the visual footprint small, and brass warms up cool hall lighting. For lettering, keep it simple: single-line surname or first name in a clean sans type. In a narrow entry, this reads as intentional wayfinding instead of a decorative afterthought.
Pro tipPair brass with a matte black hanger or hook nearby so the brass label doesn’t look like it’s floating alone.
Start by measuring the available strip beside the door — leave at least 2 inches from the trim edge so the plaque doesn’t crowd the molding. Order or make a plaque that’s about 10-12 inches wide and 2-3 inches tall, with a flat back for flush mounting. Mark the center height at about 58 inches from the floor for easy reading. Drill pilot holes for a secure mount, then attach with small matching screws and add a thin felt pad if the plaque ever touches painted trim.
One warningAvoid tiny, low-contrast engraving that disappears in hallway shadow.
2. White ceramic tile name plate on a narrow shelf end
If your small space has a skinny shelf or book ledge, a white ceramic tile name plate is a clean way to label without eating wall area. Ceramic looks crisp and reads well from a distance because it holds light instead of absorbing it. This works especially well near entry consoles where you already have keys, a mail tray, or a slim catchall. Keep the lettering dark — black or charcoal — and use a simple layout: name on one line, optional unit number on the second. The tile shape also makes the label feel grounded, even if the shelf is only 6-8 inches deep.
Choose a tile that’s roughly 4x6 inches or 5x7 inches, not bigger than your shelf end can support. Place it centered on the shelf end face, about 1-2 inches back from the front edge so it doesn’t get bumped. Clean the surface with rubbing alcohol, then mount with ceramic-safe adhesive rated for smooth painted wood or sealed surfaces. Let it cure fully before adding anything heavy nearby. Finally, wipe fingerprints off the tile after mounting so the lettering stays sharp.
Use a small tray or folded runner under the shelf end so the tile looks like part of a set, not a random label.
Skip glossy lettering if your shelf sits in glare — it can wash out the name.
3. Clear acrylic standoff name plate for a gallery wall
Clear acrylic with standoffs is a smart small-space trick because it keeps the “mass” of the label visually light. The standoffs create a small shadow gap, so the lettering pops without a bulky frame. This works great in a narrow hallway where you want multiple labels but can’t spare more wall width. Use it for first names, small surnames, or unit numbers. Go for laser-cut lettering or etched vinyl behind clear acrylic for high clarity. If your wall is patterned, acrylic keeps the label from clashing because the background stays visible through it.
Pro tipMatch the standoffs to your door hardware finish so the acrylic doesn’t look disconnected from the rest of the space.
Pick an acrylic plate width around 8-10 inches for tight corridors, and keep it under 2 inches tall for a clean stacked look. Choose standoffs that are 1/2 inch to create a subtle shadow line. Mark the mounting points using the plate’s template, then drill into drywall anchors if needed. Mount the standoffs first, then attach the acrylic plate screws or spacers. If you’re mounting multiple plates, keep consistent vertical spacing — about 2-3 inches between items — so it looks planned.
One warningDon’t use frosted acrylic in dim halls — it kills readability.
4. Chalkboard label strip above a hallway entry bench
A chalkboard label strip is practical when you might update names, switch guests, or change room use in a small home. It’s also a space-saver because it can sit on top of an existing bench, shoe cabinet, or narrow console where you already have a horizontal surface. The matte surface hides minor scuffs and reads clearly under warm lighting. Write in neat block letters with a white chalk marker or chalk pen so the name is crisp from standing height. This is best for entry zones where mail and keys already live, so the label becomes part of the routine.
Pro tipUse a small frame or trim around the strip so it looks finished and doesn’t feel like temporary decor.
Buy or cut a chalkboard strip about 10-16 inches long and 2-3 inches tall. Clean and lightly sand the mounting surface, then mount using a picture-hanging rail or strong adhesive made for chalkboard weight. Place the strip 6-10 inches above the bench top edge — high enough to avoid shoe contact. Use a chalk marker for consistent thickness, then let it dry and lightly erase to get a clean edge. Re-letter whenever you change the household flow.
One warningSkip tiny cursive writing — it turns into a blur in hallway lighting.
5. Magnetic name plate on a slim metal mail tray
A magnetic name plate is the most functional option for small spaces that demand change. Instead of mounting a fixed plaque, you label your mail zone on a slim tray and swap names when needed. This keeps the labeling close to where it’s used, so you don’t need extra wall space. Choose a slim metal mail tray with a flat front, then add a magnetic name plate sized to fit the tray face without blocking compartments. The advantage is clean updates and zero drilling. It also helps you train a routine: mail lands, label tells you what goes where.
Pick a metal mail tray that’s about 12-16 inches wide and 4-5 inches tall, with a flat front panel. Get a magnetic name plate in the same width range, usually 8-12 inches wide, so it doesn’t overhang. Place the tray against the wall or on a console, then move the magnetic plate to test readability from 6-8 feet away. Clean the tray surface, then stick the magnet and confirm it stays put when you bump the tray. If you use more than one label, stack them vertically with 1 inch spacing.
Use matte black letters on off-white acrylic for the best contrast against metal shine.
Don’t rely on tape magnets on textured metal — they loosen fast.
6. Wooden slat name sign with vertical letters
Vertical lettering on a small wooden slat sign makes a narrow hallway feel taller. The slats give texture without adding bulk, and the vertical orientation pulls the eye up. This is ideal when your small space has low ceilings or you’re trying to visually stretch a corridor. Use a warm wood tone like oak or ash and keep the letters dark — walnut stain or black paint. Keep the sign narrow, around 8-10 inches wide, and mount it beside a door or at the end of a hallway where it won’t fight other decor.
Pro tipAdd one matching wood element nearby, like a small tray or frame, so the sign looks like part of the room plan.
Choose a slat panel about 8-10 inches wide and 20-30 inches tall, with smooth edges so it sits flat. Stain or paint the letters first on a test scrap to match your wood tone, then transfer the final layout with a stencil. Mark mounting points using a level, then attach with two screws into studs or strong drywall anchors. Keep the top of the sign around 70-76 inches from the floor so it reads without ducking. Finish with a clear matte sealant so it doesn’t glare.
One warningAvoid wide signs in hallways — they block sightlines and make the space feel tighter.
7. Slim framed name plate on the inside of a closet door
A closet door label is a small-space cheat because it uses space you already have but rarely decorate. Mount the name plate inside the door so it doesn’t take up hallway wall width, and it stays hidden until the door opens. A slim frame keeps the look finished and gives you a crisp border around the lettering. Choose muted colors like white, sand, or black frame so it blends with trim. This is best for shared closets, guest storage, or a narrow pantry door where you want fast visual sorting.
Measure the inside door panel — aim for a label that’s 6-9 inches wide so it doesn’t crowd hinges. Use a thin frame with a depth under 3/8 inch so the door still closes cleanly. Mount with screws into the door material if possible, or use picture-hanging adhesive rated for smooth painted surfaces. Place the label at about 48-54 inches from the floor so it’s visible when the door opens. Add a thin felt strip behind the frame if the door face vibrates.
Use the same font style across every interior label so the system feels intentional.
Skip thick frames — they create clearance issues and scrape against the wall.
8. Doorbell-side name plate with brushed steel backing
When your entry is too tight for a big wall plaque, install the name plate where your eyes already go: the doorbell and door handle area. A brushed steel backing looks sharp and stays readable in different lighting conditions because the finish doesn’t show glare as easily as shiny chrome. Keep the name plate compact and tall enough to read — around 10-14 inches wide and 3-5 inches tall. This option solves the “I need it visible from the street or front step” problem without adding clutter inside the home. Add a simple mounting line so it looks like part of the hardware, not a separate decoration.
Pick a weather-friendly metal backing if the door area gets humidity, like a covered entry. Place the plate 6-10 inches to the side of the doorbell so people don’t confuse the button for the label. Mark mounting points and drill pilot holes, then attach with corrosion-resistant screws. If you’re working on stucco or brick, use appropriate anchors and keep the plate flush. For lettering, engrave or use vinyl in white or brushed gold so it reads instantly.
Match the letter color to your house hardware finish — white letters look clean against steel and black trim.
Don’t mount too low — it becomes unreadable when someone stands at the threshold.
9. Narrow fabric pennant name plate for a tiny entry wall
A narrow fabric pennant works when you want a softer look but still need the label to take minimal wall space. In small entries, a pennant hangs from a single nail or hook and uses vertical air instead of covering a wide rectangle of wall. Choose a medium-weight cotton or linen in cream, sand, or light gray, and print the name in dark ink. This is best for first names or short labels, because long surnames look cramped at this width. It also adds warmth, which matters in narrow hallways that can feel cold with metal plaques.
Pro tipHang it near a mirror or light source so the name catches attention without needing extra width.
Select a pennant size around 6-10 inches wide and 10-16 inches tall, with a finished edge and a pocket or grommet for hanging. Install one hook or a small wall nail at the right height — around 60-66 inches from the floor. Thread the pennant through and adjust so the bottom sits about 4-6 inches above the nearest shelf or decor. Use fabric paint or iron-on lettering applied with a test strip first, then seal with a fabric medium if you want it washable. Keep it to one color so it stays readable.
One warningSkip stretchy knit fabrics — the letters wobble and blur.
10. Black-and-white typographic name plate on a slim wall panel
A typographic name plate on a slim wall panel gives you crisp readability and a modern look without taking over the wall. The trick for small spaces is to limit the panel width and keep strong contrast: black letters on white, or white letters on black. This works especially well in narrow hallways where you want a clean visual anchor among hooks, mirrors, and art. Use a panel depth under 1 inch so it sits close to the wall. If your space has a lot of color, go monochrome so the label doesn’t fight everything else.
Pro tipUse all caps for short names — it reads faster in motion when doors open.
Build or buy a panel about 10-12 inches wide and 14-18 inches tall, then center the name in the middle with a clean font or stencil. Paint the panel with a durable matte finish, then seal it with a clear topcoat. Mount using two screws through the top corners into a stud or anchors. Keep the plate aligned with the top edge of nearby frames so the hallway looks ordered. For placement, mount 58-62 inches from the floor for first glance readability.
One warningAvoid gradients and busy textures behind the text — they reduce legibility.
11. Engraved acrylic name plate with thin border
Engraved acrylic looks sleek but still stays light, which makes it great for small walls. The engraving adds depth without adding thickness, so the name catches side lighting and stays readable. Use clear or frosted acrylic with dark engraving for a modern feel, but keep the border thin so it doesn’t widen the piece visually. This option shines in apartments and townhouses where you want labels that look clean next to light switches and outlets. Keep the name short and centered — surnames and first initials work best.
Pro tipChoose a plate color that matches your door trim — clear with dark engraving looks right next to white trim.
Order a plate sized about 8-10 inches wide and 2-3 inches tall, with a thin border. Decide your mounting method: either adhesive tape made for acrylic or two small standoff points. Clean the wall surface thoroughly, then mount at about 56-60 inches from the floor. If you’re using standoffs, use 1/4-1/2 inch standoffs so the plate doesn’t look too floating. Test the view angle from the doorway before final placement.
One warningSkip thick acrylic — it reads bulky in tight hallways.
12. Reclaimed wood name plate with a routed edge
Reclaimed wood name plates bring warmth to small spaces without needing a big frame. The routed edge makes the plaque look finished even when it’s only 10 inches wide. In tight entries, wood helps soften the hard lines of doors and baseboards, especially if your home has lots of painted trim. Keep the lettering engraved or burned with a dark finish so it reads against the wood grain. This is a great choice if your hallway lighting is warm and you want the name to feel human, not corporate.
Pro tipUse a darker stain than you think — wood grain lightens after sealing.
Pick a reclaimed wood board and sand it flat, then choose a final size around 10-12 inches wide and 2-3 inches tall. Rout or bevel a thin border so the wood edge looks intentional and hides minor imperfections. Burn or engrave the letters, then stain lightly and wipe back so the grain still shows. Seal with matte polyurethane so glare doesn’t kill readability. Mount with two screws into studs or anchors, keeping the center height around 60 inches.
One warningAvoid high-gloss finishes — they reflect lights and make the lettering harder to read.
13. Stair riser name plate for a tiny vertical moment
If your small home has stairs, the riser area is a rare place where vertical space is already “claimed.” A small name plate mounted near the top of the stairs gives a label moment without using any hallway wall width. Keep it compact and aligned with the stair line so it doesn’t look like clutter. Choose a durable finish because stair areas get scuffs and fingerprints. Use a ceramic or metal plate with a matte finish so it stays readable under mixed lighting. This option is also great for guest names or family names when you want a personal touch without adding frames.
Select a plate size around 4-6 inches wide and 2-3 inches tall, sized to fit comfortably on the riser face. Clean the surface and check clearance for foot traffic and any handrail movement. Mount with screws and anchors if the riser material allows, or use a heavy-duty adhesive designed for ceramics or metal on painted surfaces. Place it 6-10 inches below the top step for visibility when you start climbing. Seal edges and keep corners rounded if you’re mounting near high-contact zones.
Match the letter color to your handrail finish so the stair label looks like it belongs.
Don’t place it where shoes hit — scuffs make the name look messy fast.
14. Magnet-backed fridge-style name plate for a kitchen entry wall
In many small homes, the kitchen entry wall is the only blank wall you can reach. A magnet-backed name plate on a small metal panel keeps labeling flexible and doesn’t require permanent mounting. It also works for shared kitchens where names change — roommates, visiting family, or rotating guest labels. Choose a metal panel about 12-18 inches wide, then add a magnetic plate that’s readable from standing distance. This delivers the label function without turning the wall into a clutter shelf. Keep the design simple: one name, one line, strong contrast.
Mount a small metal panel to the wall using screws into studs if possible, then leave it flush. Install it at about 54-60 inches from the floor so the name is eye-level when you enter. Choose a magnetic name plate that’s 8-12 inches wide and fits cleanly on the panel without overlapping edges. Place it centered and test from the doorway to confirm readability. If you want multiple labels, create a two-row system with 1-2 inches gap between plates.
Use white letters on black plate for the sharpest reading against metal shine.
Avoid thin metal panels that flex — the magnets won’t hold cleanly.
15. Wall vinyl name decal on a narrow vertical stripe
A vinyl name decal applied onto a narrow vertical stripe is the smallest footprint option when you want labels but hate plaque clutter. You’re basically creating a custom “label column” that doesn’t take up much width. The stripe acts like a background box, so the letters stay readable without a frame. This is best in narrow hallways where walls are busy with hooks and art and you need one clean label area. Choose a stripe color that matches trim or a repeated accent in the room. Keep the name in a bold font and avoid thin scripts.
Pro tipUse a matte stripe finish so the letters don’t catch glare from overhead lights.
Paint or tape off a vertical stripe about 6-8 inches wide where you want the name to live. Let the paint cure fully, then clean the area with rubbing alcohol. Apply vinyl letters using transfer tape for clean alignment — center the name at around 58-62 inches from the floor. Use a squeegee to press down firmly, especially around corners and small letter gaps. After placement, remove transfer tape carefully and smooth any edges with a soft cloth.
One warningDon’t place vinyl over textured paint — the edges lift and the name looks uneven.