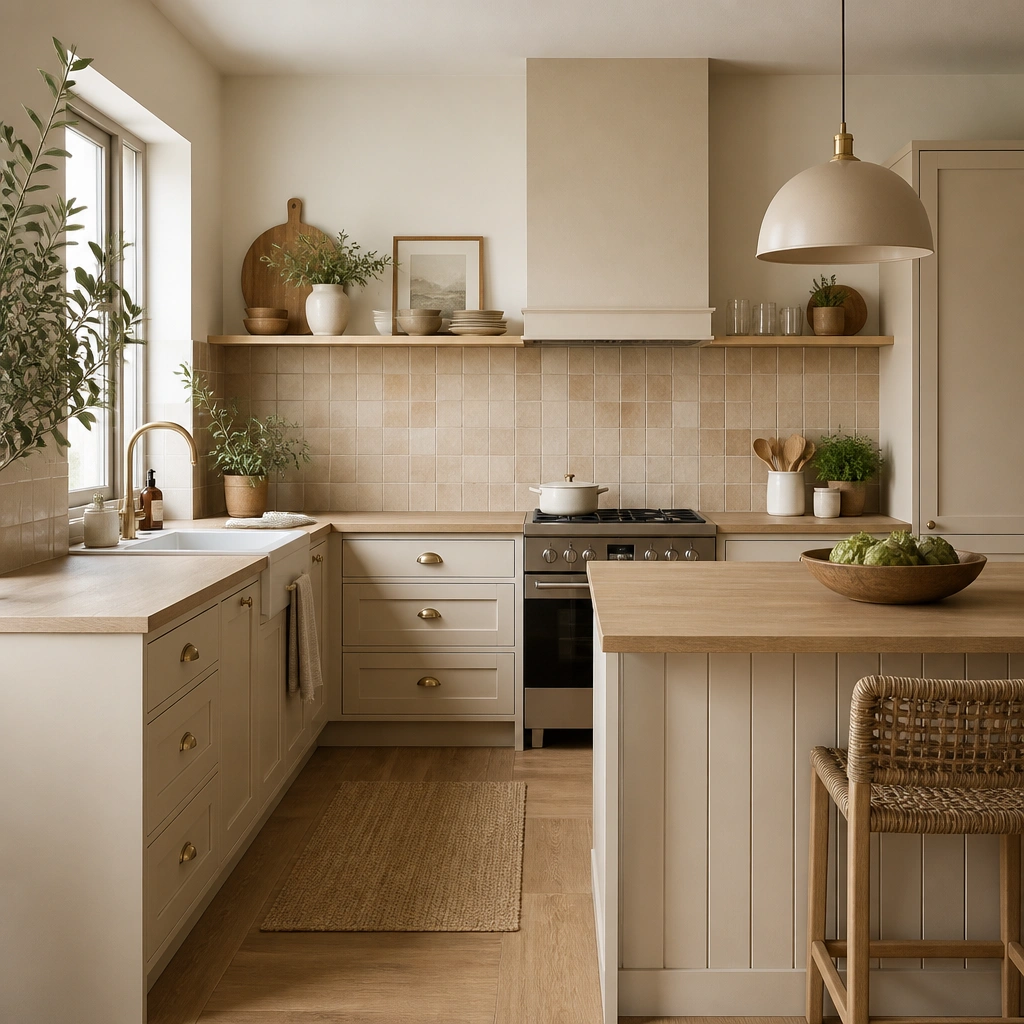
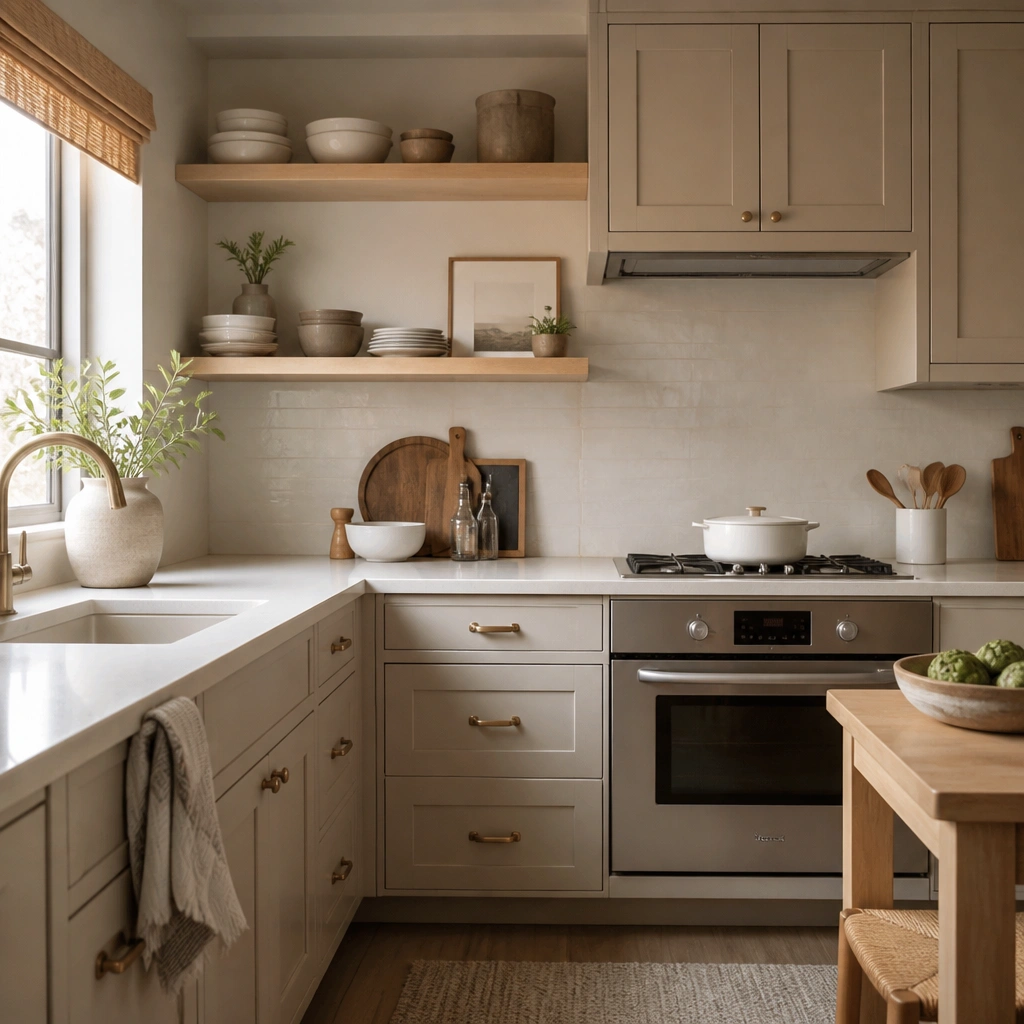
1. Bonding-primer + warm beige cabinet paint (no full refinish)
This is the most direct path to beige kitchen cabinets budget on a budget because it changes color across every door and drawer without replacing cabinetry. Choose a warm beige that sits between cream and sand — it reads like “beige kitchen” instead of “off-white.” Use a cabinet paint system with bonding primer so the finish grips slick laminate or older varnish. Then pick a sheen that looks like real cabinetry — satin or eggshell on doors is the sweet spot for easy wipe-down without looking shiny. Pair it with brass or brushed nickel pulls so the beige doesn’t look flat.
1) Clean with a degreaser, then scuff-sand doors with 180-220 grit and wipe dust off with a tack cloth. 2) Roll or brush on bonding primer (thin coats), let it cure as directed, then paint warm beige in 2-3 thin coats using a foam roller for flat areas and a angled brush for edges. 3) Finish with a cabinet topcoat if your system requires it, and replace hardware after the final cure. Budget: $80-180 for primer + paint for an average 10x12 kitchen worth of doors and drawers, plus $30-80 for hardware.
Pro tipPaint the inside lip of the door too — that tiny shadow line makes the beige look professionally finished.
One warningDon’t skip sanding on glossy cabinets; paint failures usually start at the primer stage.
2. Beige glaze over white cabinets for a softer antique look
If your cabinets are already white or off-white and you want beige without repainting the whole look from scratch, glazing is a budget-friendly trick. Glaze adds warmth and depth in panel lines, so shaker doors stop looking flat. The result reads like “beige kitchen cabinets” because the glaze tints recesses and edges, not because you paint everything one flat color. This works especially well for kitchens with white countertops and a cream backsplash where you want a gentle, lived-in warmth. Keep the glaze light — you’re after a whisper of beige, not a muddy brown.
1) Clean and lightly scuff-sand the cabinet faces, then apply a bonding primer only if the surface is peeling or slick. 2) Tint a glaze mix toward warm beige (start lighter than you think), then brush it into grooves and wipe the surface clean with a lint-free rag. 3) Let it cure, then seal with a clear topcoat recommended for glazed finishes. Budget: $60-130 for glaze + supplies, plus $25-70 for new pulls if you want extra contrast.
Pro tipUse a dry rag wipe right after brushing — the faster you pull glaze back, the lighter and cleaner the beige looks.
One warningDon’t glaze over greasy cabinets; the glaze will skip and look patchy.
3. No-sand cabinet paint with a deglosser for lightly glossy doors
Sometimes the cheapest “beige kitchen cabinets budget on a budget” win is reducing labor. If your cabinets are lightly glossy but still solid, a deglosser + bonding paint system can save time without risking adhesion. You’re not skipping prep entirely — you’re using a chemical deglosser that etches the surface so paint grips. This works well for flat-front doors and shaker faces where sanding would be slow. Choose a beige tone with enough pigment to cover evenly, and keep the coats thin so the finish doesn’t look textured.
1) Degrease thoroughly, then apply the deglosser exactly as the product instructs and wipe off residue. 2) Apply bonding primer if the paint system requires it; otherwise apply the recommended coat right after the deglosser stage. 3) Paint warm beige in 2 coats and check edges for thin spots, then cure before reinstalling. Budget: $90-200 for paint + deglosser depending on kitchen size, plus $20-80 for hardware.
Do a test panel on one door — if it rubs off, you need more abrasion, not more paint.
Don’t use this approach on peeling finishes; if the top layer is failing, sanding won’t be optional.
4. Peel-and-stick vinyl wrap in warm beige woodgrain
Vinyl wrap is one of the lowest-cost ways to get the beige cabinet look without painting, and it’s great for renters or anyone who wants a reversible change. Pick warm beige woodgrain vinyl so the cabinets don’t look like flat paper. The texture hides minor imperfections and gives depth when light hits the grain. This works best on doors that are flat or have simple profiles; deep carved details will show seams. Pair it with dark hardware and a simple backsplash so the beige doesn’t look yellowed or cheap.
1) Remove doors and drawers, clean with a strong degreaser, and dry completely. 2) Cut vinyl slightly oversized, align from top edge, then apply with a squeegee from center outward to avoid bubbles; trim the edges with a sharp utility knife. 3) Seal only if the brand recommends it, and reinstall after 24 hours so adhesive bonds. Budget: $40-120 for vinyl rolls depending on kitchen size, plus $20-80 for pulls.
Wrap the door edges too; leaving raw edges is where vinyl jobs look unfinished.
Don’t apply on humid days; vinyl bubbles show up fast when the air is damp.
5. Spray-painted cabinet doors on a budget jig (for factory-smooth look)
If you want a smoother beige finish than most brush-and-roller jobs, spray painting is the budget route — but only if you control overspray and dry time. A simple jig keeps doors flat so paint doesn’t run at hinges and edges. Use warm beige and a satin clear topcoat if your paint system supports it. This is ideal for kitchens where you have lots of doors and want them to match closely. It also hides small roller marks, which makes the cheap project read more “real cabinetry.”
1) Set up a ventilated area, hang doors on a jig or on hooks so you can spray front and edges without touching wet paint. 2) Clean, scuff-sand, prime with bonding primer, then spray 2-3 light coats of warm beige, keeping consistent distance and letting each coat flash/dry fully. 3) Spray a satin clear coat if required, then cure before reinstalling hardware. Budget: $100-250 for paint + primer + clear, plus $30-90 for hardware.
Pro tipSpray edges in one pass, not multiple back-and-forth strokes; edges look cleanest when they’re not overworked.
One warningDon’t rush re-coats; thick wet layers cause drips and orange-peel texture.
6. Beige cabinet door refacing panels with peel-and-stick beadboard look
Refacing panels are a smart budget compromise when your cabinet boxes are fine but the doors look dated. Peel-and-stick beadboard-style panels (in warm beige) give you a textured, cabinet-like surface without painting the old door. The trick is to choose panels that match your door size and have clean edges so seams aren’t obvious. This works best on flat cabinet door fronts where your door frames are straight. The beige reads warm and intentional, and you keep the labor lower than a full paint job.
1) Measure each door and buy panels cut-to-size or cut them yourself with a straightedge; remove doors so you can work flat. 2) Clean and dry, then apply panels carefully starting in the center and smoothing outward; use a sharp blade for corners. 3) Reattach hinges and install new pulls to complete the look. Budget: $120-300 depending on door count and panel pricing, plus $25-90 for hardware.
Use a thin foam roller to press seams — it reduces lifting at edges.
Don’t stretch the panels; tension creates bubbles that show under kitchen lighting.
7. Shaker trim overlay on beige-painted doors (fake "built-in" look)
If your doors are flat and boring, trim overlay creates the shaker pattern that makes beige cabinets look designed, not accidental. Paint the base warm beige, then add thin wood trim strips or MDF strip trim to form rails and stiles. The beige will look more expensive because the eye reads structure first, color second. This is best for kitchens with simple countertops where you want the cabinet face to be the focal point. Choose trim in a matching warm white or slightly lighter beige so the pattern stays crisp.
1) Prime and paint doors warm beige, then let them cure fully. 2) Mark a grid for rails and stiles using a square; cut trim strips, then glue with wood glue or construction adhesive and clamp or tape for solid contact. 3) Fill tiny gaps with wood filler, sand smooth, and paint trim if needed. Budget: $60-180 for paint + primer, plus $40-120 for trim and filler, and $30-80 for hardware.
Pro tipDry-fit one door first and adjust spacing so the trim lines look even from standing height.
One warningDon’t glue trim before the base paint cures; it can pull up edges when you press.
8. Beige cabinet hardware swap with consistent spacing templates
Hardware is the cheapest lever for a beige kitchen cabinets budget on a budget outcome because it changes how the whole cabinet reads. If you already have beige or near-beige cabinets, upgrading to matte black, aged brass, or brushed nickel makes beige look intentional instead of “painted.” Use a consistent pull style across uppers and lowers so the kitchen feels cohesive. This also fixes the “cheap” look when old knobs are mismatched or installed at random heights. Even with no cabinet paint, this alone can make the beige vibe feel complete.
1) Remove one drawer pull and measure the exact center-to-center spacing; use a hardware template or make one from cardboard. 2) Mark holes with a level, drill carefully with the right bit size, and install pulls and knobs in a consistent pattern (for example, centered on drawers and aligned vertically across doors). 3) If holes don’t match, use small filler plates or move hardware to existing holes only if the layout still looks straight. Budget: $25-120 depending on pull brand and size.
Pick one finish and repeat it everywhere — pulls, faucet, and lighting hardware should share the same undertone.
Don’t mix warm brass pulls with cool chrome; beige gets weird fast when metals fight.
9. Matte beige cabinet topcoat over existing paint using a bonding skim
Sometimes cabinets are already painted beige-ish, but the finish is shiny, uneven, or scuffed. A budget fix is to skim problem areas and apply a matte (or true satin) topcoat so the surface looks uniform. This works when the current paint layer is stable — no peeling, no bubbling — and you just need a better surface finish. Matte beige looks more modern and hides minor imperfections better than glossy paint. It also makes beige look calmer next to busy backsplashes.
1) Clean and sand the surface lightly with 220 grit, then spot-fill chips with filler and sand smooth. 2) Apply a bonding primer or skim coat only where needed, then topcoat the whole cabinet face in warm beige or convert to a consistent tone with tintable topcoat. 3) Let it cure and avoid heavy cleaning for the first week. Budget: $70-160 for topcoat + supplies, assuming you’re not repainting from scratch.
Use a foam roller for the flat faces and keep a wet edge — matte finishes show lap lines if you stop mid-panel.
Don’t use a high-gloss topcoat; it makes every brush mark and uneven patch stand out.
10. Budget beige cabinet paint with a light faux-wood grain technique (rag-rolling)
This is a sneaky way to make beige kitchen cabinets budget on a budget look like custom wood without paying for real wood veneer. Paint the base warm beige, then apply a darker beige glaze or stain mix and drag it lightly with a rag to create subtle grain lines. The key is to keep the grain faint so it reads like texture, not a pattern. This is best for kitchens where you want warmth but don’t want the cabinets to look like painted flat panels. It also hides small dents and roller texture better than a plain finish.
1) Paint doors warm beige and let them cure. 2) Mix a slightly darker beige glaze, apply a thin layer, then rag-roll or drag with a clean rag in short, uneven strokes following the door length. 3) Wipe back highlights and seal with a clear topcoat. Budget: $90-200 for paint + glaze + topcoat, plus $30-80 for hardware.
Practice on one spare door panel board; grain that’s too dark looks fake immediately.
Don’t overwork the grain — repeated dragging turns it into muddy streaks.
11. Beige cabinet doors with peel-and-stick faux mullions (cheap grid pattern)
If your cabinet doors are plain rectangles, adding a grid pattern changes everything without replacing doors. Peel-and-stick faux mullions let you create a pseudo divided light look, which reads more “high-end” and makes beige feel architectural. Choose mullions in a slightly darker beige or warm white so the grid shows up clearly. This option is great for pantry doors, upper cabinets, or any spot where you want visual interest. Keep the base beige consistent so the pattern doesn’t look random.
1) Paint or wrap doors warm beige first if needed, then clean and dry completely. 2) Plan the grid spacing using measurements from one door; apply mullions with a ruler and press firmly along the length to avoid lifting. 3) Seal edges if the product allows, then install hardware. Budget: $40-120 for mullion strips plus $20-80 for hardware, depending on how much you need.
Align the grid with your countertop and backsplash lines so it looks built-in, not stuck on.
Don’t place mullions too close to edges; leave a small border so the pattern looks intentional.
12. Beige cabinet color match using tinted primer and one coat of topcoat
This is a budget method that cuts paint coats by using tinted primer. If your cabinets are a dark color underneath, tinted primer helps the beige cover faster and reduces the chance you’ll need a third topcoat. The beige ends up more even because the base is already close to the final tone. This works best when you’re painting — not wrapping — and the cabinet doors are in decent shape. It’s also a good way to avoid streaking around edges and corners, which is where cheap paint jobs often look sloppy.
1) Sand and degrease, then apply a tinted bonding primer close to your warm beige target. 2) After it cures, apply one topcoat in warm beige — two coats only if you see thin spots. 3) Use a foam roller for flats and an angled brush for edges, then cure fully before reinstalling. Budget: $90-190 total for primer + topcoat + supplies, with hardware $30-80 if you’re swapping pulls.
Pro tipUse a light test coat on one door to confirm the tinted primer shade under your kitchen lighting.
One warningDon’t tint primer too dark; beige that’s too brown will look dusty instead of warm.
13. Beige cabinet finish with vinyl edge banding for clean seams
Edge banding is the small fix that makes budget beige cabinets look neat. If your cabinet doors have exposed particleboard edges or worn laminate edges, beige paint or wrap will never look fully clean until those seams are covered. Use beige vinyl edge banding to cover the sides of door faces and drawer fronts so the cabinet looks like it has crisp framing. This is especially helpful when you’re wrapping with vinyl and want the edges to look factory. It also reduces moisture exposure on the edges, which matters around sinks and dishwashers.
1) Remove a door, measure its edge lengths, and cut edge banding strips slightly oversized. 2) Apply with a heat iron or iron-on edge banding tool, then trim flush with a sharp blade and sand lightly. 3) Paint or seal the edge if needed to match the beige tone. Budget: $15-40 for banding and blades per kitchen, plus $20-50 if you need specialty tools.
Match the beige edge banding undertone to your cabinet paint so edges don’t look yellow or gray next to the face.
Don’t leave the banding overhanging; trimming after it cools is cleaner than trying to cut while hot.
14. Replace only drawer fronts with beige slab fronts and reuse boxes
If your drawers are the worst-looking part, replacing only drawer fronts is a budget surgical move. You keep the cabinet boxes and just swap the faces that take the most wear. Beige slab fronts look modern and clean, and they make the whole kitchen feel updated even when upper cabinets stay the same. This works best when your existing boxes are sturdy and you can reuse the drawer slides. Keep the beige tone warm and matte so it doesn’t look like a different kitchen.
1) Measure each drawer front height and width precisely, then order or cut slab fronts in warm beige (MDF or pre-primed boards that you paint). 2) Remove old drawer faces, transfer hardware locations or drill new holes using your pull template, then attach the new fronts to the drawer boxes. 3) Paint or seal if needed, and reinstall pulls. Budget: $100-300 depending on whether you buy pre-made fronts or DIY from MDF; hardware $30-90.
Reuse the existing slide hardware if it’s straight; replacing slides costs more than front panels.
Don’t guess measurements; drawer fronts need tight alignment to avoid crooked gaps.
15. Beige cabinet doors with affordable glass inserts and warm beige frames
Glass inserts make beige cabinets look lighter and more expensive because they add depth without adding cost. You don’t need fancy full glass doors; just swap one or two upper cabinet doors or pantry doors with inexpensive glass panels. Use a warm beige frame or paint the door frame beige so the glass reads cohesive, not contrasty. This setup is great when you have open shelving clutter — glass gives you a place to hide dishes while still showing curated items. It also helps beige look less flat by reflecting light through the glass.
1) Remove the door, measure the opening, and buy replacement glass inserts or cut panels from a local glass shop with the right thickness. 2) Frame the glass with painted trim or use insert kits if your door design supports it; seal edges to prevent rattling. 3) Paint the frame warm beige, then reinstall and add matching pulls. Budget: $60-200 for glass + inserts depending on number of doors, plus $25-80 for hardware.
Use frosted or seeded glass for a softer beige effect; clear glass shows dust and fingerprints faster.
Don’t use cheap thin clear glass; it can look wavy and cheap behind beige paint.