1. Sage cabinet doors with white hardware
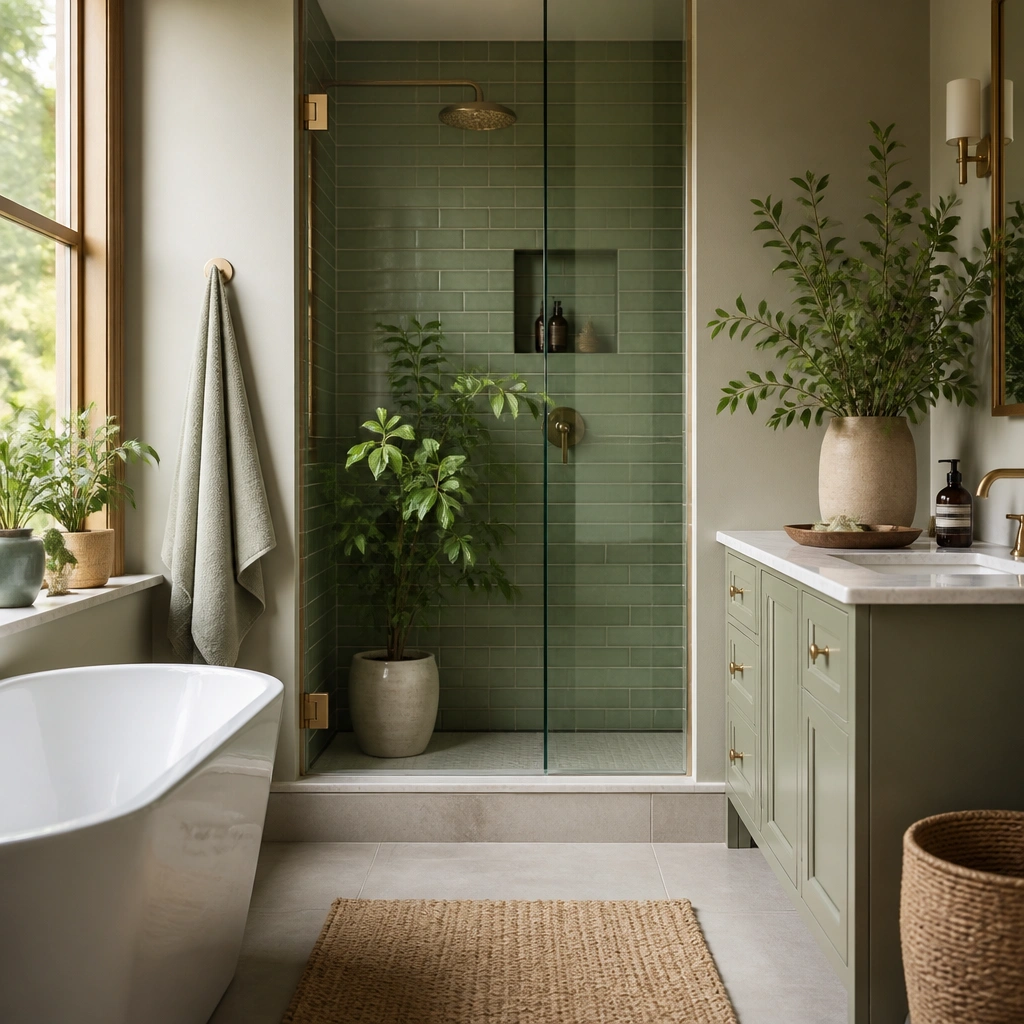
If your vanity is the biggest piece of furniture in the room, painting just the cabinet doors gives you the strongest green hit for the least money. Sage works with white sinks, chrome faucets, and light floors because it reads soft, not harsh. A semi-matte finish hides brush marks and fingerprints better than glossy paint. Keep hardware white or swap to white knobs so the green doesn’t look dirty or too “dark.” This is a good budget green bathroom idea on a budget when you want a real furniture makeover without touching tile or plumbing.
Remove the doors and drawers if you can. Sand lightly with 150-grit, degrease with dish soap and warm water, then let fully dry. Use a bonding primer made for laminate or slick surfaces, then paint two coats of sage cabinet paint (about $25-45 for a small can). After curing, reinstall and switch to simple white knobs or pulls (usually $10-30 total). Keep the cabinet interior walls untouched so you don’t have to repaint a whole box.
Tape off a crisp line where the door meets the frame, then paint the frame only if the gap line is already clean.
Don’t use flat wall paint on cabinet doors; it chips and smears faster in a bathroom.
2. Peel-and-stick sage backsplash behind the sink
A backsplash is the budget move that feels like a real renovation because it frames the sink and catches the eye every time you wash your hands. Sage peel-and-stick tile works especially well when your counter is white or light wood since the green looks clean, not muddy. Use a tile pattern that is smaller than you expect — a 2x4 or subway-style strip looks more like “tile” and less like a sticker. This idea suits renters because you can remove it later, and it stays contained so you don’t have to commit to painting the whole wall.
Measure the wall area between the counter and the underside of the mirror or medicine cabinet, then buy enough peel-and-stick sheet or roll to cover it with 2 inches of extra margin. Clean the wall with rubbing alcohol and let dry completely. Start at the center line under the mirror and work outward, smoothing with a plastic scraper to avoid bubbles. Keep it away from direct steam — a small gap or caulk line at the counter edge helps. Budget: peel-and-stick tile often lands around $20-60 for a small bathroom backsplash.
Pro tipChoose a grout-look pattern and keep the rest of the bathroom simple so the “tile” reads intentional.
One warningDon’t apply over glossy paint without sanding; tiles lift and curl after a few months.
3. Forest shower curtain with a white waffle liner
Shower curtains are the easiest way to add deep green without dealing with tile. Forest green looks sharp against white tubs, white grout, and chrome fixtures, and it makes the whole bathroom feel more cohesive. Pair it with a white liner so water stays contained and the curtain hangs flatter. If your bathroom is small, choose a curtain that hits the floor without pooling — pooled fabric makes the room look messy. This is one of the best budget green bathroom ideas on a budget because the cost is low and the visual payoff is immediate.
Measure from the rod to the floor and add 1-2 inches so the curtain doesn’t ride up. Pick a forest curtain with a weighted hem, then add a separate white liner (usually $15-30 for both). Hang the liner first, then the curtain, using rust-resistant rings to avoid staining. If your curtain has grommets, make sure the rod diameter fits so it doesn’t snag. Cost estimate: $25-70 depending on fabric weight.
Use the same green tone in towels or a rug within two weeks; matching undertones makes it look designed.
Don’t use a flimsy curtain without a liner; it clings to your legs and looks cheap fast.
4. Towel ladder in olive, with matching hand towels
A towel ladder is a small-space cheat because it adds vertical color without taking up wall square footage. Olive is forgiving — it reads warm with brass or gold-toned fixtures and it doesn’t look neon next to white tile. Fold hand towels and keep them consistent in size so the ladder looks styled, not random. This works when you don’t want to paint anything and you want green to show up every day in a controllable way. It’s budget-friendly because you’re buying textiles, not materials that require prep.
Pick a lightweight towel ladder (wood or metal) that fits your available corner space, usually 16-24 inches wide. Buy two matching olive hand towels and one larger bath towel, or mix sizes in the same fabric line. Place the ladder near the sink but not where it will be blasted by shower spray. Fold towels the same way each time and keep them stacked to two layers. Budget: ladder $25-80, towels $20-50 total.
Choose cotton or cotton-blend towels with a visible weave; flat thin towels look gray-green instead of olive.
Don’t hang wet towels on the ladder and leave them — mildew stains the fabric and makes the green look off.
5. Painted mirror frame in sage with peel-and-stick trim
Mirrors are already a focal point, so changing the frame color gives you a designed look without touching the wall. Sage on a mirror frame reads bright and clean, especially if the rest of the bathroom is white. If you have a plain frame or a builder-grade mirror, add a thin border with peel-and-stick trim and paint it or use a pre-cut molding strip. Keep the border narrow — around 1 to 1.5 inches — so it doesn’t overpower a small space. This idea gives you green “around the face” of the room, which is where people actually look.
Clean the mirror frame or surrounding trim with degreaser and let dry. For peel-and-stick trim, apply thin strips along the edges first, press firmly, then paint over if the trim is paintable (follow the trim packaging). Use painter’s tape to protect the mirror glass and apply two coats of sage in semi-matte. Let it cure fully before hanging or handling. Cost: peel-and-stick trim $8-20, paint $15-35.
Spray paint in a satin finish gives the smoothest look on small frames without brush marks.
Don’t paint directly onto glossy plastic trim without sanding or bonding primer.
6. Green contact paper on vanity drawers
This is the quiet upgrade that makes the whole vanity feel newer. Green contact paper in drawers creates a consistent color moment when you open the cabinet, and it hides scuffs and water marks. Sage or muted olive works best because it doesn’t fight your wall color. Choose a matte or subtle texture, not high gloss, so it doesn’t reflect light harshly. It solves a real budget problem: you can’t always afford to repaint or replace a vanity, but you can make what’s visible feel clean and intentional.
Empty the drawers and wipe down with a damp cloth, then dry fully. Measure the drawer base and cut contact paper with a sharp utility knife, leaving 1/4 inch extra for trimming. Peel and apply slowly, smoothing from the center outward to prevent wrinkles. Trim edges with the drawer still in place for clean lines. Budget: contact paper is usually $10-25 for enough coverage.
Use a small piece of the same contact paper to line a bathroom organizer tray so everything matches.
Don’t use thick textured contact paper if your drawer slides tight; it can peel at the edges.
7. DIY green framed art from thrifted prints
Wall art is a high impact move, but budget art looks cheap when it’s mismatched or the frame is wrong. The fix is simple: thrift prints with green tones, then swap the frames to a consistent color. Sage-green prints or olive botanical line art work with bathrooms because the colors don’t overpower the tile. Hang the art at eye level and keep the frame size proportional to the wall — smaller than you think in tight bathrooms. This is a budget green bathroom idea on a budget because you’re paying for frames and prints once, and it doesn’t require any construction.
Search thrift stores for prints with green tones in any style, then buy matching frames in a single finish such as white, light wood, or black. Print size matters: aim for 8x10 or 11x14 so it doesn’t overwhelm. Use acid-free backing if the print curls, then replace the backing board for a clean fit. Hang with picture hooks rated for drywall or use command strips if you’re in a renter situation. Budget: thrift print $2-8, frames $15-40 each depending on size.
Choose frames with a mat board so the print looks crisp and more expensive.
Don’t hang art too high; top edges near the ceiling make small bathrooms feel cramped.
8. Green paint stripe as a 'waterline' band
A horizontal stripe is the easiest way to make a bathroom look styled without repainting everything. The waterline band — roughly 48 to 60 inches from the floor — hits the visual zone around mirrors and sinks. Sage or soft mint keeps it fresh, while olive looks more grounded with wood accents. Matte paint hides wall imperfections, which matters in older apartments where the wall texture is uneven. This solves the budget issue where you want green, but you don’t want to commit to full wall paint.
Mask the wall with painter’s tape at your target height, usually starting around 48 inches up and ending around 60 inches. Use a level to keep it straight and mark the edges lightly with pencil. Prime any scuffed areas, then roll on two coats of green wall paint in matte or eggshell. Keep the rest of the wall white or off-white so the stripe is the focus. Cost: primer + paint for a small band is often $30-80 total.
Use a small foam roller for the stripe to avoid roller marks along the tape line.
Don’t choose a neon green; it will look harsh in bathroom lighting.
9. Olive peel-and-stick wallpaper on the upper half wall
Peel-and-stick wallpaper looks expensive when you treat it like a panel, not a whole-room wallpaper job. Put it on the upper half wall above a chair rail or above where towels hang, and keep the lower half white for contrast. Olive patterns with small scale (dots, tiny botanicals, or subtle texture) work best in small bathrooms because they don’t visually crowd the room. This is a budget green bathroom idea on a budget because you can cover only one wall or half a wall and still get a full effect. Also, you can remove it later if you hate it.
Choose a wallpaper with a straight or easy pattern repeat so you waste less. Clean the wall thoroughly, then apply to a dry, low-steam zone — avoid the direct shower surround. Start at a level reference line and smooth each strip as you go, trimming edges with a sharp blade. Use a trim piece at the top or sides for a finished look. Budget: peel-and-stick wallpaper is commonly $20-60 for a bathroom-sized panel.
Pro tipIf your wall has outlets, turn off power and use a utility knife to cut around them cleanly.
One warningDon’t put wallpaper behind a toilet tank where steam collects.
10. Green bathroom rug in a low-pile washable style
A rug is where green becomes practical instead of just decorative. Choose a low-pile, washable rug in sage or deep green so it doesn’t trap moisture and it stays looking clean. In bathrooms with light floors, a green rug anchors the space and reduces that “floating towel” feeling. If you’re on a tight budget, this is one of the few changes that affects both the look and the day-to-day comfort. It also gives you a safe way to test green tones before committing to paint.
Measure the space in front of the sink or shower, then buy a rug that leaves 2-4 inches of floor visible around it so it doesn’t feel cramped. Look for machine-washable tags and rubber backing that grips tile. Place the rug where it dries fast — not right in the path of dripping water. Budget: $15-45 depending on size and material.
Pro tipMatch the rug undertone to either your towels or your shower curtain, not both if the shades are different.
One warningAvoid high-pile shag rugs; they hold water and look worn quickly in bathrooms.
11. DIY green 'tile' floor mat using peel-and-stick vinyl squares
If your floor is plain or shows wear, you can add a green “tile zone” without touching the actual flooring. Vinyl peel-and-stick squares in sage or olive create a patterned landing area that looks intentional and hides scuffs. Keep the pattern small and contained — think a 2x3 or 3x3 zone in front of the sink or at the vanity. This idea works great for renters because you’re not changing the floor permanently, and it makes the bathroom feel more designed even with minimal other upgrades.
Clean the floor with soap and water, then dry completely. Peel-and-stick vinyl squares need firm adhesion, so avoid applying over dusty grout lines. Lay out a test grid first, then start from the center and work outward. Press each square down firmly with a roller or the back of a spoon, especially edges. Budget: vinyl squares often run $25-70 for a small mat area.
Pro tipUse a simple straight layout instead of a diagonal for a tighter, cleaner look in small bathrooms.
One warningDon’t place vinyl directly under a high-wet area where water sits; edges lift.
12. Green soap dispenser and toothbrush holder set in matching finish
Counter clutter is what makes budget bathrooms look unfinished. Matching green accessories fix that instantly because they create a planned visual block around the sink. Pick one green tone and one finish — matte ceramic, frosted glass, or textured resin — so it doesn’t look like random thrift finds. Sage and olive look especially good with white counters and brass faucets. This is one of the cheapest budget green bathroom ideas on a budget because you’re spending $20-40 on items that change the room’s “daily” look every time you enter.
Choose a soap dispenser, toothbrush holder, and a small tray if you have counter clutter. Wipe down the counter and keep products dry so you don’t get water spots on matte finishes. Group items on a tray sized to your counter edge so nothing spreads out. Budget: $8-20 per item depending on material, usually $25-60 total for a set.
Pro tipStick to matte or frosted finishes; shiny plastic makes green look cheap fast.
One warningDon’t mix three different greens (mint, olive, and forest) in the same sink zone.
13. Painted towel bar and hooks in dark green
Hardware is small, but it’s visible constantly. Painting towel bars and hooks in dark green gives you a crisp, coordinated look without changing the walls. Deep green hardware pairs well with white tile and brushed nickel or chrome because it adds a strong but controlled color. The win here is that it looks intentional even if everything else is plain. It’s a budget idea because you’re using paint and basic supplies, not replacing fixtures.
Remove small hardware if possible. Clean thoroughly with degreaser, then sand lightly to help paint grip, especially on metal. Use a metal primer and a spray paint designed for high-touch surfaces, usually satin or semi-matte. Apply thin coats and let cure fully before reinstalling. Budget: primer + spray paint $20-40 depending on brands.
Use painter’s tape to protect tile edges, and paint in a well-ventilated area to avoid dust landing on tacky coats.
Don’t skip primer; paint chips off painted metal fast in humid bathrooms.
14. Green window treatment using a single panel and cafe rod
Window treatments are often overlooked, but they’re a big source of color in bathrooms with natural light. A single green curtain panel on a cafe rod adds privacy and softens the room without blocking the whole window. Sage and muted greens look light and clean in small bathrooms, while deeper greens feel richer but need good light. Keep the fabric medium weight so it hangs straight — thin sheers can look flimsy next to tile. This is a budget green bathroom idea on a budget because you’re buying one panel instead of building a complicated valance.
Measure the window width and pick a panel that covers it with 6-10 inches extra so it gathers slightly. Install a cafe rod inside the window frame area or just above it, depending on trim. Hang the panel and adjust the length so it hits just above the sill or slightly below for a neat line. Budget: $20-60 for a single panel plus rod hardware if you don’t already have it.
Pro tipPick a curtain with a simple weave or subtle texture; it reads more expensive than smooth flat fabric.
One warningDon’t choose a bright, glossy fabric that reflects overhead light and makes green look neon.
15. Green candle holders and a small 'counter moment' tray
Bathrooms feel unfinished when the counter is either bare or cluttered. A small tray holding two matching green candle holders (or a candle holder plus a small vase) creates a calm, repeatable styling point. Choose green glass or ceramic in sage or olive so it doesn’t look harsh under bathroom lighting. Skip heavy decor — bathrooms get steamy and cramped, and bulky items look crowded. This idea is budget-friendly because you can find candle holders cheaply and you’re styling an existing surface, not building something new.
Pick a tray that fits your sink counter edge, then choose two green holders that match in color and finish. Clean the surface, then place the tray in a consistent spot, usually near the mirror side. If you use candles, keep them away from airflow and never leave them unattended. Budget: $10-30 for candle holders and $10-25 for a tray.
Pro tipUse one tray color family across the bathroom — either all white/cream or all green — so the look stays tight.
One warningDon’t stack tall items; they block the mirror line and make a small bathroom feel cramped.
16. Painted toilet tank lid in sage with a removable label set
If your toilet tank lid shows scuffs or looks plain, it’s a sneaky spot to add green without changing the walls. Sage paint on the lid reads fresh and clean, and it pairs well with white toilets and light tile. Keep the styling minimal so it doesn’t look like a storage shelf. Add removable labels or a simple organizer tray so the green area looks intentional instead of random. This solves the budget problem where you want green but you don’t want to repaint large surfaces.
Clean the lid thoroughly, scuff lightly with fine sandpaper, and wipe with alcohol. Apply a bonding primer for smooth surfaces, then two coats of sage in satin or semi-matte. Let it cure fully before adding anything on top. Use small removable labels on a tray or bin so the items look organized and the lid stays tidy. Budget: paint and primer $25-45, plus labels/tray $10-25.
Choose a satin finish; it wipes clean and doesn’t look chalky in bathroom light.
Don’t use glossy paint; it shows dust and water spots more clearly.
17. Green vanity shelf styling with peel-and-stick hooks underneath
Adding a small shelf or using an existing one lets you create a green styling line without repainting walls. Use a green shelf (stain a thrifted wood shelf or paint one) or place a green shelf liner on a simple floating shelf. Then add peel-and-stick hooks underneath for hair tools, brushes, or a loofah — the hooks keep clutter off the counter. Olive and sage work well because they don’t overpower white walls and they hide fingerprints better than bright mint. This gives you a functional, budget-friendly green bathroom idea on a budget that also improves daily organization.
If you’re using a shelf already, line it with green contact paper or paint a thrifted shelf with cabinet-grade paint. For hooks, choose peel-and-stick hooks rated for bathroom humidity and place them on a dry wall section near the shelf underside. Style with a few consistent items — one soap, one lotion, one cup — and keep everything else in a drawer. Budget: shelf $10-30 if thrifted, hooks $10-20, liner/paint $10-25.
Use one container shape (all glass bottles or all ceramic) so the green shelf looks planned.
Don’t overload the shelf; cramped stacks make small bathrooms feel cluttered.